Compact Power: My 3D-Printed 10-Inch Server Rack for a Home Lab Dream Team
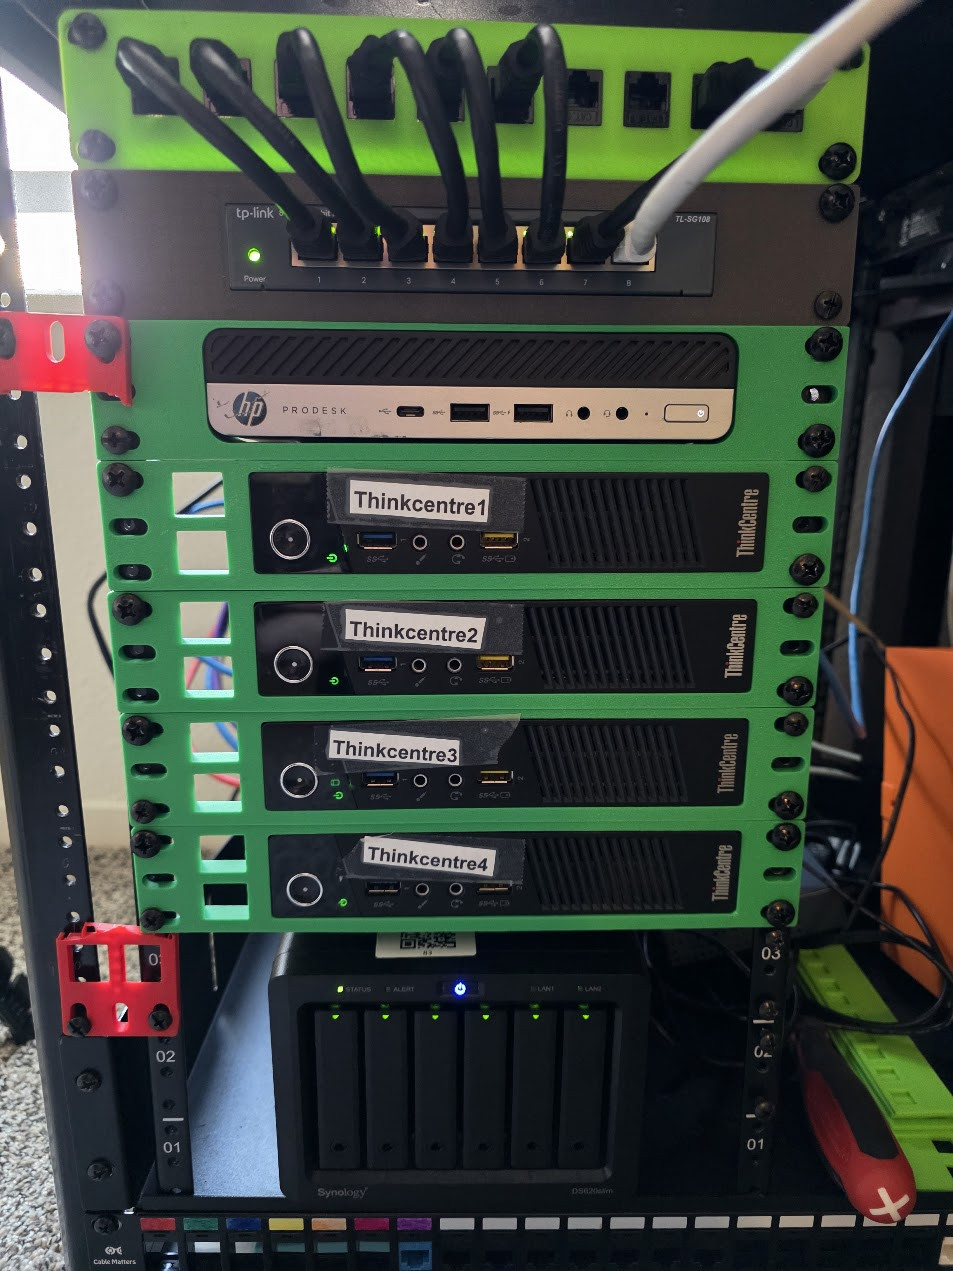
Building a home lab is always an exercise in creativity and resourcefulness, but for me, the true magic came when I decided to 3D print my own 10-inch server rack. Designed to house an HP mini PC, four ThinkCentre mini PCs, and a 6-bay Synology NAS, this custom project turned into a testament to the power of DIY ingenuity. Let me walk you through the process and why this compact setup is the ultimate mini powerhouse for my home lab.
Why 3D Print a Server Rack?
When looking for a server rack, I realized that commercial options either didn’t fit my compact vision or were too expensive for what I wanted. So, I thought, why not design and 3D print one? It was the perfect opportunity to merge functionality with creativity and craft something tailored to my specific needs:
- Size: A compact 10-inch rack was ideal for my limited space.
- Customization: The ability to design shelves and mounting options for my unique setup.
- Cost-effectiveness: Using my 3D printer made this a budget-friendly project. And I didn’t have to go to the store or wait for delivery.
The Design: Fitting It All Together
The design phase was like solving a complex puzzle. Each component had its own requirements:
- HP Mini PC and ThinkCentre Mini PCs: These compact systems needed securely mounted shelves with efficient airflow to keep them cool.
- 6-Bay Synology NAS: A robust and weighty addition that required a sturdy lower shelf with proper cable management.
- Compact Form Factor: The rack needed to maximize vertical space while maintaining accessibility for upgrades and maintenance.
I used 3D modeling software to create modular components. The final design included rack rails, ventilated shelves, and a cable management system to keep everything tidy.
Printing and Assembly: Bringing the Rack to Life
Printing the parts was an adventure in itself. Here’s how I tackled it:
- Materials: I chose PLA+ filament for its strength and durability, ensuring the rack could handle the weight of all my equipment.
- Prints: Each component was printed in manageable sections to accommodate my printer’s build size. This approach also allowed for easy replacements if needed.
- Assembly: The modular design came together like a charm, using screws and bolts to secure the parts into a solid structure.
Once assembled, the rack was sleek, sturdy, and perfectly sized for my home lab.
The Setup: A Mini Powerhouse
With the rack complete, it was time to populate it with my gear:
- HP Mini PC and Four ThinkCentre Mini PCs: These systems form the backbone of my compute cluster, handling virtual machines, containers, and other workloads.
- 6-Bay Synology NAS: Acting as the storage hub, the NAS integrates seamlessly with the rest of the setup, providing high-speed access to all my data.
Despite its small footprint, the rack is a powerhouse, enabling me to run a variety of home lab projects without compromising on performance or reliability.
Final Thoughts: A Compact Dream Come True
This 3D-printed server rack has become the crown jewel of my home lab. It’s compact, efficient, and a perfect blend of form and function. The ability to design and build something tailored to my needs was incredibly rewarding, and it’s proof that with a little creativity, you can achieve big things—even in a small package.

Leave a Reply